Make-Up Exploration
Georgie Kennett
Foam Latex Prosthetics


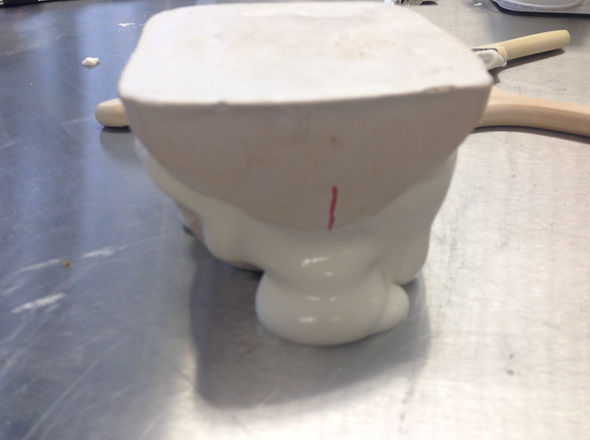


The bleeder holes should drilled into tyhe areas where there are dips and wrinkles to ensure foam travels to all of those areas without becoming trapped and creating air bubbles. The bleeders can be cut off after the foam has dried and been demoulded.
The screws inserted to the mould must be appropriate as copper screws can make the foam go black so this is important, a drill and bolt spinner are used to secure the mould together. When the foam starts to come through the bleeder holes the holes must be blocked up with clay to prevent any further leakage.
It is important to not use oil based clay to block up the holes as they will melt in the foam oven while the foam is cooking.
For filling this mould with foam latex Gilles Paillet used around 13% geling agent because the room temperature was 21 degrees. The foam was stirred in the mixer for roughly 4.15 minutes, it was refined for 6 minutes and after the gel waas poured in it is mixed for a further 30 seconds then stirred for another minute before it is ready to be poured into the inection gun shown above then injected into the mould shown directly above.
Bleeder holes have to be made when injecting foam latex into a mould so that the moisture can escape if it is a non pourous mould for example fiberglass which is a non pourous mould. If the bleeder holes are not made the foam would collapse.
100 degrees can be too high for the oven but that is what temperature is being used to cook this foam. Open moulds take longer that are non pourous it takes a couple of hours for a flatpiece to cook. Closed mould plaster takes 1 hour per cm to cook, a fiberglass non pourous mould can take 1 hour per mm. If the foam is overcooked the elasticity will not be the same as it should be and will become more rigid.
More foam than needed should be poured into the mould shown above.
The mould should be tapped to remove any air bubbles the foam should cure within 10-30 minutes in the plaster mould above before transferring to the oven to cook.
By pressing the foam you can tell if the foam has cured and is readu for the oven- if the fingerprints stay in the foam when you press it and there is no liquid it is ready for the oven.
For this foam latex batch Gill used:
-
200g of latex.
-
20% foaming agent so 40g is used.
-
10% curing agent so 20g is used.
-
Colour can be added if required (liquid blood can give a pink hue to the foam.
-
Because the room was 23 degrees Gill added 12% of gel agent equaling 24g.
-
The foam is mized for 2.5 minutes and then once gel agent is added an extra minute.
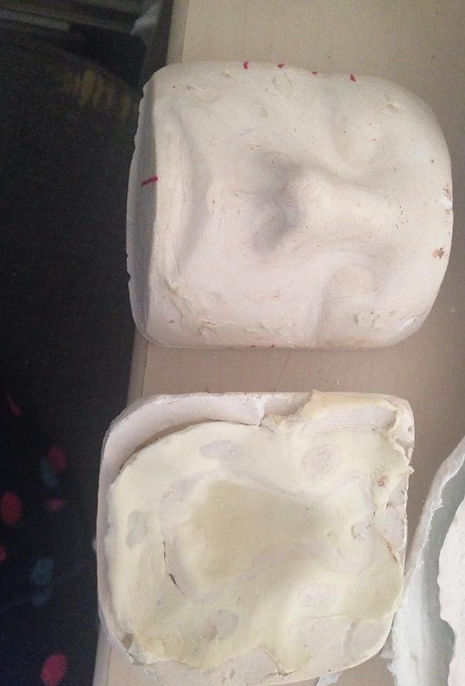
The mould should be marked with a pen to show where the mould slots together.
Mould release is brushed onto the mould all over and on the outside as well. Vaseline does not work as a mould release for the foam latex so it should not be used as an alternative to mould release.
Injecting Foam Latex
Foam Latex Demonstration by Gill Paillet.
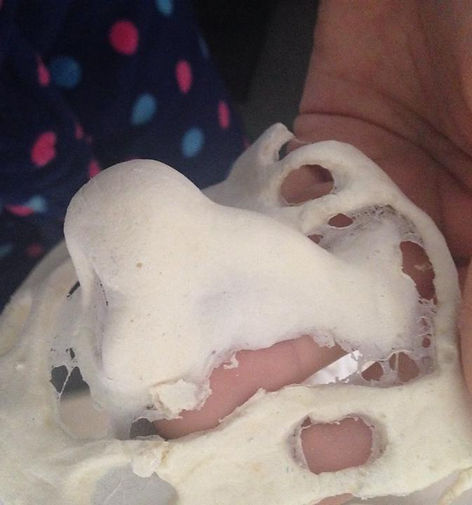

There were a couple of air bubbles at the front of the nose piece on the tip these have probably come from air getting trapped when the mould was pushed together with the foam inside perhaps I pushed down on the mould too quickly or it is that air has been trapped when the foam latex was poured into the mould. The second is probably the most likely problem because the air bubbles are right on the tip of the nose.
As you can see the edges did rip off quite a lot and this is probably because I did not use powder and a brush when de moulding, in future that is what I will need to do to keep the edges in tact however had the edges not have ripped they would have been thin and easy to apply to the skin.
I used a small knife to pry open the mould making sure to pull the mould open slowly to prevent ripping the edges off completely. The mould was extremely difficult to pull apart however when it did finally lift slightly I was able to seperate the mould quite quickly.